

If you’re dreaming of hiking in Patagonia, Mirador Las Torres is a must. It’s one of the most iconic hikes in Chile’s Torres Del Paine National Park, offering jaw-dropping views of the famous granite towers and a turquoise glacial lake.
The best part? You don’t need a car or expensive tour to experience it. Even if you’re staying in Puerto Natales on a tight budget, you can do this incredible hike in a single day using a bus and shuttle.
This detailed guide will walk you through exactly how to do it—step by step.
Quick Facts About The Mirador Las Torres Hike
-
Distance: 20 kilometers (12.5 miles)
-
Elevation Gain: 1,015 meters (3,325 feet)
-
Max Altitude: 870 meters (2,860 feet)
-
Duration: 6–10 hours round trip
-
Difficulty: Hard

How To Get To Torres Del Paine
Flights To Puerto Natales
The closest airport to Torres Del Paine is Puerto Natales (PNT), which has daily flights from Santiago and Puerto Montt. You can find deals on Skyscanner.
Bus From El Calafate, Argentina
If you’re coming from Argentina, there’s a direct bus from El Calafate to Puerto Natales. I took this option myself—it was simple and comfortable. The journey takes about 6 hours.
Three Ways To Reach The Trailhead
By Car
Renting a car offers the most flexibility. You can drive straight to the Torres Del Paine Welcome Center from Puerto Natales (about 2 hours), and even stay overnight at the luxurious Hotel Las Torres, right at the trailhead.
By Guided Tour
Prefer not to drive? You can book a day tour with GetYourGuide, which includes hotel pickup, park entrance, and a guide to take you to the towers. It’s a great option if you want a hassle-free experience.
By Bus (The Budget-Friendly Way)
This is what I did—and yes, it works great!
-
Cost: 28,000 CLP (~$30 USD) roundtrip
-
Company: Bus-Sur
-
Departure Station: Terminal Rodoviario in Puerto Natales
-
First Bus Leaves: 6:45 AM
-
Arrives At Park: 8:45 AM
-
Return Bus Departs: 8:15 PM
-
Back In Town: Around 10 PM
You’ll ride the bus to Laguna Amarga, where rangers will check your park ticket (buy it online beforehand!). Then take a 15-minute shuttle to the Welcome Center, which costs 4,500 CLP cash. This shuttle cannot be reserved in advance, but it runs frequently and reliably.
Sample Hiking Timeline (Based On My Trip)
-
9:00 AM – Start hiking from the Welcome Center
-
10:30 AM – Reach Refugio Chileno (rest stop, food, restrooms)
-
12:30 PM – Arrive at Lago Torres
-
2:30 PM – Begin return hike
-
5:30 PM – Back at Welcome Center
-
7:00 PM – Shuttle back to Laguna Amarga
-
8:15 PM – Bus to Puerto Natales
This gives you 10 hours of trail time, which is more than enough if you maintain a steady pace and don’t dawdle too long.
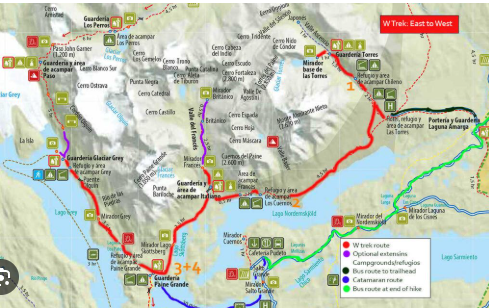
Map Of The Trail
You’ll start at the Torres Del Paine Welcome Center. The trail is well-marked and popular, so it’s hard to get lost. However, I highly recommend downloading the route from AllTrails (available offline with AllTrails+).
What To Expect On The Trail
Trailhead To Refugio Chileno
The hike starts with a flat trail through meadows, passing Hotel Las Torres.
After 2.5 km, the terrain becomes a steady uphill climb until you reach the Windy Pass, where you’ll get your first panoramic views.
Continue to Refugio Chileno, a lodge with snacks, WiFi, and restrooms (for a fee). This is a great place to take your first real break.
Refugio Chileno To Lago Torres (Base Las Torres)
The trail then winds through a lush forest for about 3 km with a gradual incline.
Eventually, you’ll reach a clearing with a cut-off point sign—if you arrive after 2 PM (or 3 PM in summer), rangers will not let you continue to the towers.
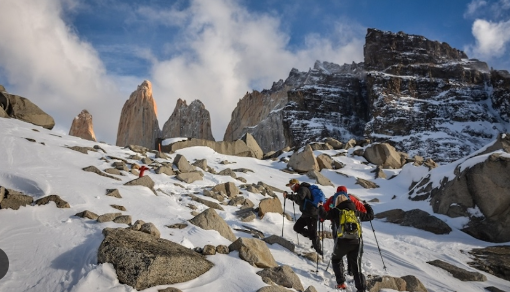
The final kilometer is the most difficult part: a steep, rocky climb to Lago Torres, with loose stones and lots of scrambling. Take your time here—it’s tough but doable.
Once at the top, you’ll be rewarded with stunning views of the three granite towers rising above a glacial lake. It’s an unforgettable sight.
Can You Hike Without A Guide?
Yes! A guide is not required during the regular season (October–April).
Just be sure to buy your park ticket in advance online, and check the cut-off time posted at the trail.
Best Time To Visit Mirador Las Torres
-
Spring (September–November): Great weather, fewer crowds
-
Fall (March–May): Cooler but quieter
-
Summer (December–February): Long days, busiest season
I visited in early November, and it was perfect—mild weather, blooming scenery, and just enough snow at the base of the towers to make the photos extra dramatic.
What To Bring For The Hike
-
Layers: Weather in Patagonia can change fast. Bring a jacket, hat, and gloves.
-
Snacks: Food at the Refugio and Welcome Center is overpriced. Bring your own trail snacks (energy bars, jerky, etc.).
-
Water: Carry at least 2 liters. Streams are available, but use a filter to be safe.
-
Hiking Poles (optional): Useful for the steep, rocky sections.
-
Map: Download from AllTrails for offline navigation.
-
Cash: You’ll need cash for the shuttle.
Final Thoughts
Hiking to Mirador Las Torres was the highlight of my trip to Patagonia. The combination of towering peaks, valleys, and that turquoise glacial lake at the end is absolutely unforgettable.
Whether you’re doing it solo, with friends, or as part of a longer trek, this guide proves you can make it happen even on a budget—with no car and just a bus ticket.
Take the earliest bus, start the hike by 9 AM, and enjoy one of the most incredible trails in South America!